
Maybe you were born with an eye for design, color, and layout. Perhaps you’re one of those people who can simply drive a nail into the wall and hang a picture that’s in perfect alignment.
Good for you.
But for the rest of us, hanging a picture can be an agonizing process of trial and error that turns walls into Swiss cheese.
It doesn’t matter how beautiful your artwork looks if it’s not hung on the wall properly. Here are our tips for displaying your artwork beautifully.

Tip #1: Hang at Eye Level
You’ve probably heard that artwork should be hung at eye-level. But whose eye-level? Someone who is 5’2”… or 6’7”?
Here’s a rule that art galleries around the world use: Always display the artwork’s center 57 inches from the floor. Not the ceiling. The floor.
Repeat: The center of the piece. Not the top edge. Never “eyeball” or guestimate. A metal measuring tape is essential, especially if you are hanging several pieces in a grouping.
With framed wall art, measure the full outer frame before marking its center and hanging position.
Of course, there are exceptions to every rule.

Tip #2: Don’t Hang at Eye Level
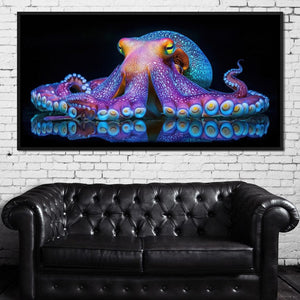
Here’s an exception to the 57-inch rule: When hanging artwork above furniture, such as a sofa or bed, the bottom of the frame should be between six to eight inches above the top of the furniture.
Does this place the center of the artwork higher than 57 inches? It’s OK.
For a wide sofa or headboard, horizontal wall art gives you a shape to compare with the furniture below. Check the artwork’s dimensions and mark its outline before hanging.

Tip #3: Keep Things in Proportion
Of course, when hanging art above larger pieces of furniture, it should be in proportion.
An individual piece or layout of multiple pieces that are about a third of the furniture’s size is the general rule of thumb. Otherwise, the artwork will appear too small or too large.
To compare sizes using the same design, A Touch of Blue in a Golden Grove offers options including 20×10, 40×20, and 60×30 inches. Make a paper template of your chosen size to see how it relates to your furniture before deciding.
And speaking of multiple pieces, treat them as one large piece of art.

Tip #4: Managing Multiples
Lay your artwork out on the floor in your desired pattern. This makes it easy to play with their arrangement before you pound a bunch of nails into the wall.
No floor space? No problem!
Cut kraft paper into templates that match the size of the art and tape them to the wall with painter’s tape. Write a description of the piece (“Susan’s baby picture,” “sunflowers in vase”) on the paper for reference.
This will give you a nice visual as to how your arrangement will look before hanging. Then, leave the templates in place as you hammer and hang each item.
And don’t forget the 57-inch rule: Hanging multiple works around the 57-inch focal point will make the entire group appear balanced.
One more thing: When spacing between pieces, the ideal width is 3 to 6 inches.
A design such as Pine Trees Forest has both single-piece and five-piece format options. If you choose a multi-panel format, check its panel layout and spacing guidance, and plan the full arrangement before making any holes.
Follow these four easy tips when hanging art, and your artwork will look picture perfect.
Ready to find a piece for your space? Shop horizontal wall art, then use these tips to plan its placement.